See it for yourself
Free and interactive, in your browser. No sign-up, nothing to install.
The controls on each display
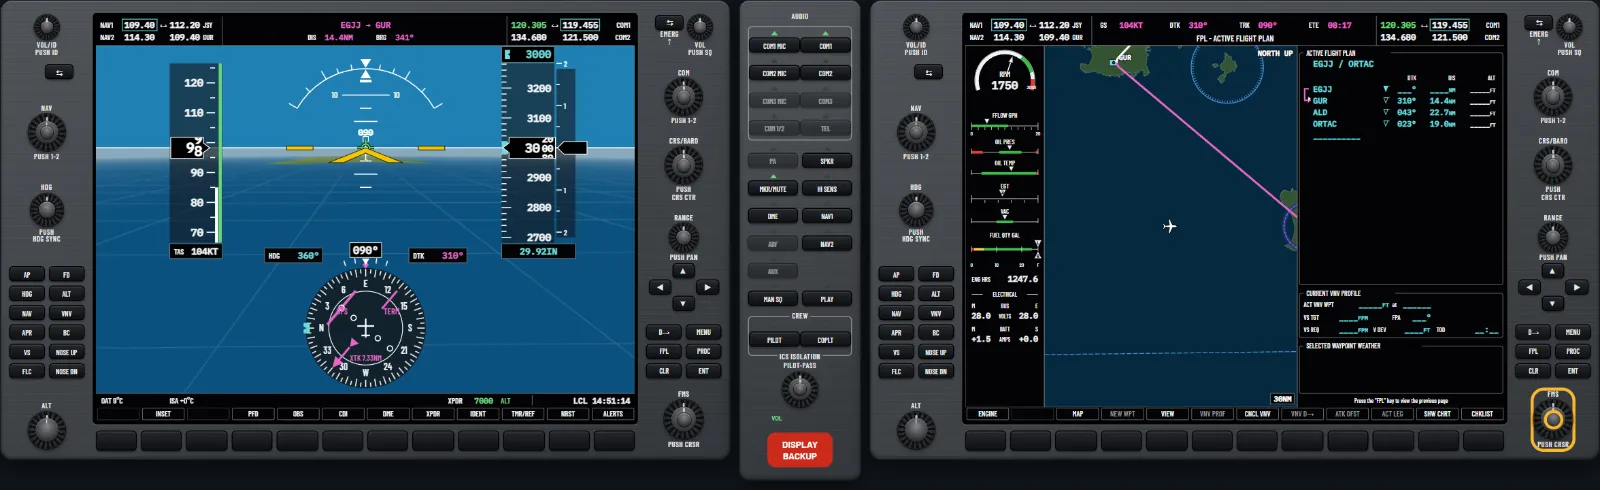
There are two screens. The primary flight display (PFD) is on the left, the multi-function display (MFD) is on the right and the audio panel sits between them. Each has the same knobs and keys in its frame, and you can tune the radios from either.
Left side, top to bottom
- NAV knobs: volume, a key that swaps the active and standby frequencies, and a dual knob with the large ring for MHz and the small ring for kHz.
- HDG knob: sets the heading bug on the HSI, the compass display. Push it to bring the bug to your current heading.
- Autopilot keys: on displays that have them. The autopilot modes guide explains them.
- ALT knob: sets the selected altitude, large ring for thousands and small ring for hundreds.
Right side, top to bottom
- COM knobs: laid out like the NAV knobs. Hold the swap key for two seconds to tune 121.5 MHz.
- CRS/BARO knob: the large ring sets the altimeter pressure. The small ring sets the course when the HSI is on a VOR or in OBS mode.
- Joystick: turn it for the map range and push it for the map pointer.
- Six keys: Direct-to, MENU, FPL, PROC, CLR and ENT.
- FMS knob: the dual knob at the bottom.
Try it: Switch on, acknowledge the databases and meet the softkeys and FMS knob
Softkeys and their levels
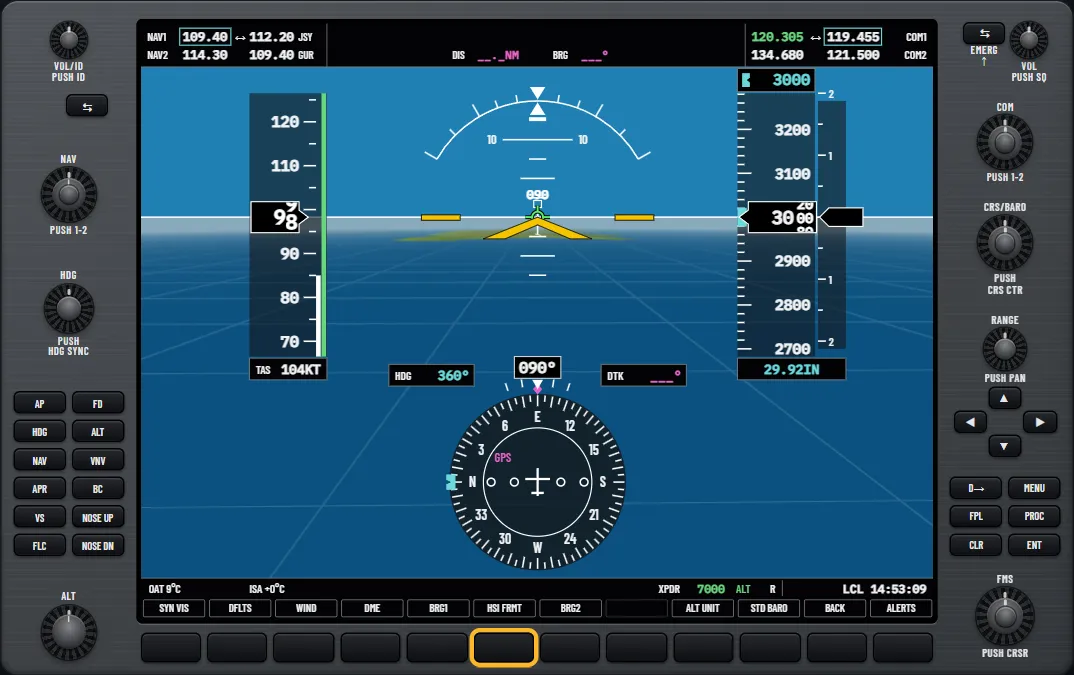
A softkey is a key under the screen whose job is shown by the label above it. Each display has twelve, and the labels change with the page and the level. There are three kinds:
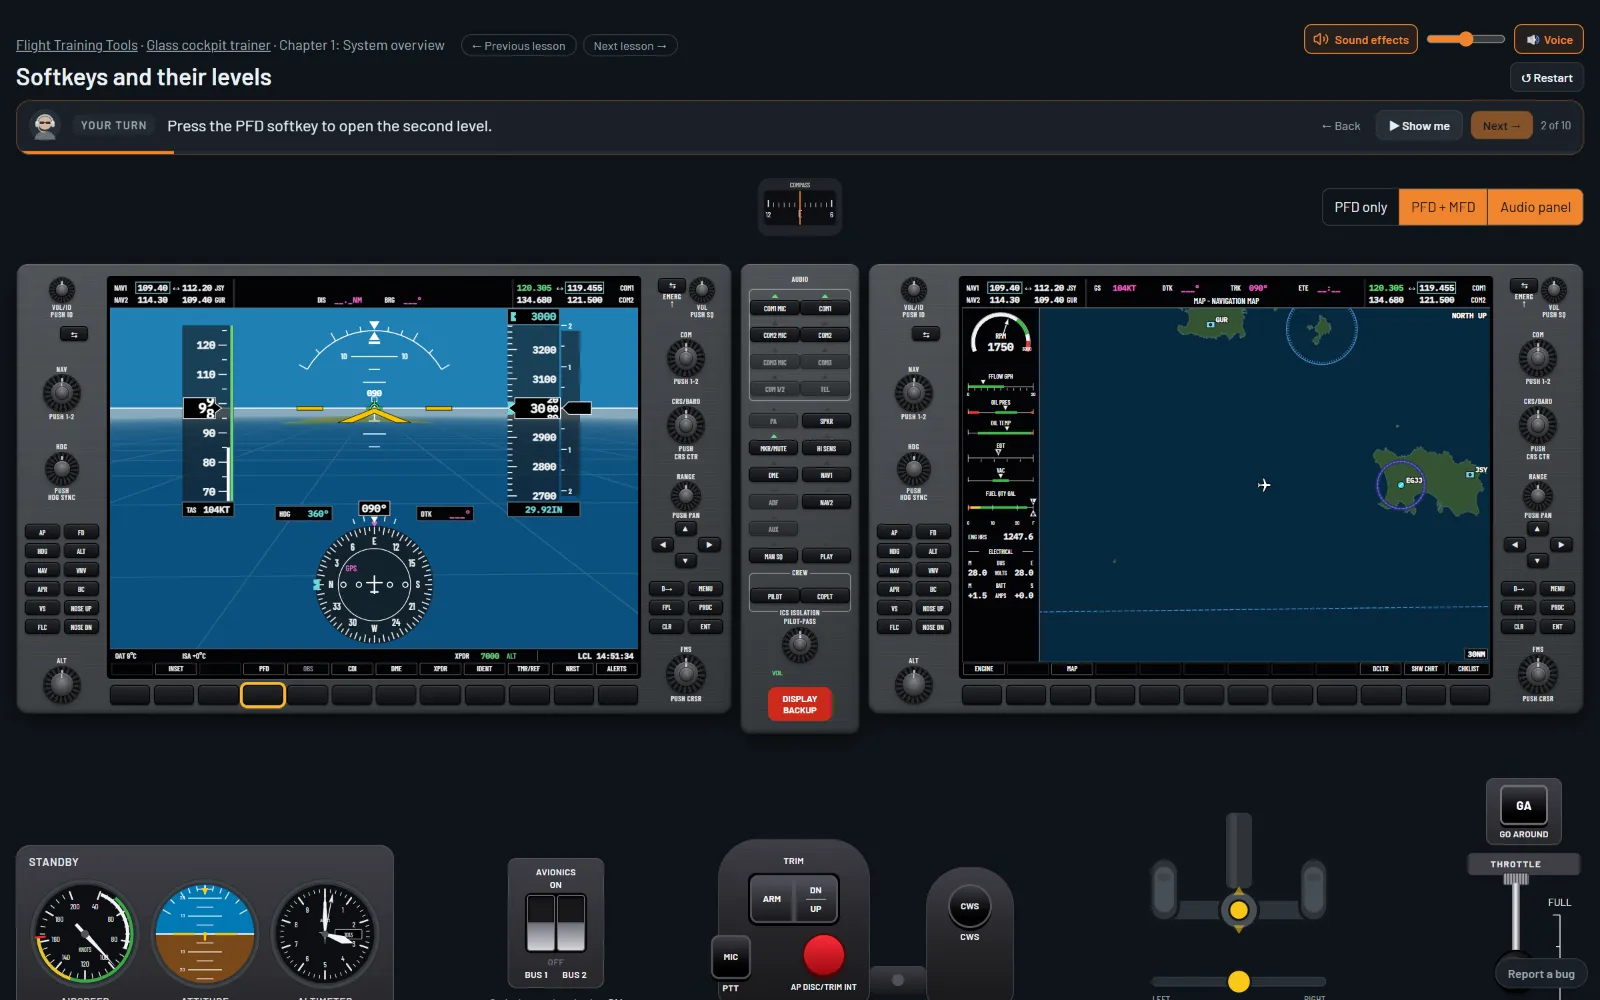
- Level keys open another row of keys. The PFD softkey opens a second row, and HSI FRMT on that row opens a third.
- On and off keys show black on grey when on and white on black when off. TOPO on the MFD’s map level is one.
- One-press keys flash briefly and return to normal. CDI, IDENT, TMR/REF, NRST and ALERTS work this way.
The PFD’s top row reads INSET, PFD, OBS, CDI, DME if fitted, XPDR, IDENT, TMR/REF, NRST and ALERTS. Every level below it has BACK on the eleventh key, which takes you up one level, and ALERTS on the twelfth. The PFD guide explains the instruments themselves.
The MFD works the same way. On the Navigation Map page, MAP on the third key opens a row with TRAFFIC, PROFILE, TOPO, TERRAIN and AIRWAYS, and BACK returns you to the top row.
Try it: Go down the PFD levels and back up, then use the Map level on the MFD
Page groups and the FMS knob
The MFD’s pages are sorted into groups. With the cursor off, the large FMS knob chooses the group and the small knob chooses the page inside it. The title at the top of the screen names both, for example MAP - NAVIGATION MAP.
- Turn either FMS knob one click. The group tabs appear at the bottom right.
- Turn the large knob to the group you want.
- Turn the small knob to the page you want.
The tabs run in this order:
- MAP: Navigation Map, Traffic Map and a terrain page, plus weather pages where fitted.
- WPT: airports, intersections, NDBs, VORs and user waypoints.
- AUX: Trip Planning, Utility, GPS Status, System Setup and System Status.
- FPL: Active Flight Plan and Flight Plan Catalog.
- Checklist: only when checklists are fitted.
- NRST: the nearest airports, intersections, NDBs, VORs, user waypoints, frequencies and airspaces.
Two groups have their own keys. FPL opens the flight plan pages directly. PROC opens a menu of departure, arrival and approach, and your choice opens the matching loading page. You cannot step through those loading pages with the knob.
If you lose your place, press and hold CLR on the MFD. The Navigation Map comes straight back.
Try it: A quick tour of the nearest airports, airport information, system status and flight plan
The MENU key and page menus
MENU lists the options for the page or window on screen. There is no master menu for the whole system, so the list changes with what you are looking at. If nothing applies, the window says No Options.
- Press MENU. The Page Menu window opens.
- Turn the FMS knob to move the highlight.
- Press ENT to choose the highlighted option.
- To leave without choosing, press CLR or push the FMS knob.
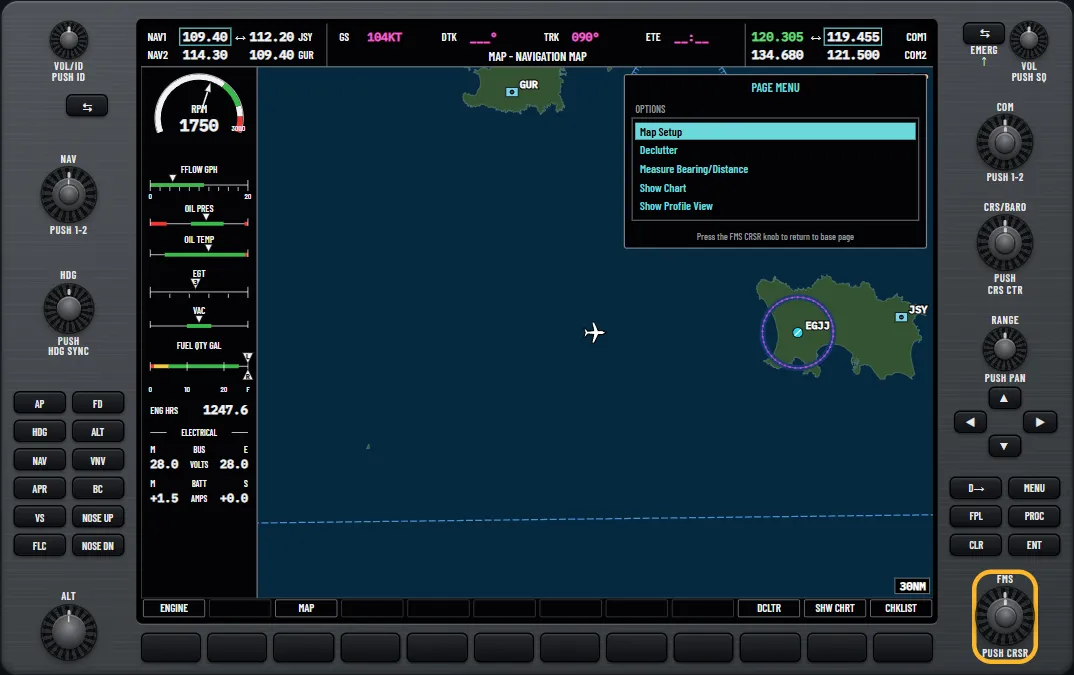
The Navigation Map’s menu offers Map Setup, for example. The flight plan window’s menu offers Store Flight Plan, Invert Flight Plan and Delete Flight Plan.
Try it: Open a page menu, close it two ways, use it, then visit the page groups
Entering data with the FMS knob
The FMS knob has two jobs, and the cursor decides which one it is doing. With the cursor on, every setting takes the same moves:
- Push the FMS knob. A flashing cursor appears.
- Turn the large knob to move to the field you want.
- Turn the small knob to open its list or change its value.
- Press ENT to accept, or CLR to cancel.
- Push the FMS knob again to turn the cursor off.
If the knob has stopped changing pages, the cursor is probably still on. To type a waypoint, the small knob picks each character and the large knob moves to the next position. On the Active Flight Plan page, what you enter goes in above the highlighted line. The flight plan guide puts this to work.
Try it: Move between fields, pick from a list, accept with ENT and cancel with CLR
Start with these lessons
These five lessons in the glass cockpit trainer for the G1000 work as a free G1000 tutorial for beginners, set up as a Cessna 172S:
- Power up and find your way around the controls
- Menus and the page groups
- Softkeys and their levels
- The FMS knob and data entry
- Find your way around
Coming from round dials? Read the guide to moving to a glass cockpit next. In the aircraft, the approved pilot’s guide and your instructor come first.
Questions pilots ask
- How many softkeys does the G1000 have?
- Twelve along the bottom of each display. The label on the screen above each key tells you what it does at that moment.
- What does a grey softkey mean?
- Black text on a grey background means the softkey is on. White text on black means it is off.
- What does FMS stand for?
- Flight management system. On the G1000 it labels the dual knob at the bottom of each display’s right-hand side, which chooses pages and enters data.
- Which key goes straight back to the Navigation Map?
- CLR on the MFD. Press and hold it and the Navigation Map appears, whichever page you were on.
- Which softkeys show the altimeter setting in hectopascals?
- On the PFD, press the PFD softkey, then ALT UNIT, then HPA. The IN key on the same row goes back to inches.
- Does a softkey ever open a menu?
- No. A softkey opens another row of keys, a window or a page, never a menu.
See it for yourself
Free and interactive, in your browser. No sign-up, nothing to install.
Sources and further reading
- FAA: Advanced Avionics Handbook (FAA-H-8083-6)
- FAA: Instrument Flying Handbook (FAA-H-8083-15B)
- SKYbrary: Glass Cockpit Avionics in Light Aircraft
A teaching aid, not an operating manual: the aircraft's flight manual, the published procedures and your instructor come first.
Unofficial training aid. Not affiliated with or endorsed by Garmin. Not for flight: always follow the approved pilot's guide and your instructor. Garmin and G1000 are trademarks of Garmin Ltd. or its subsidiaries.