See it for yourself
Free and interactive, in your browser. No sign-up, nothing to install.
Engaging and disconnecting
The autopilot keys sit in a block on the left of each display. Press AP and a green AP appears in the middle of the status box. If the flight director was off, it comes on in roll hold (ROL) and pitch hold (PIT), keeping the attitude you had. If it was on, the autopilot moves to its command bars and your modes stay as they were.
AP DISC on the control wheel, the AP key, the go-around switch and the electric trim switch all disconnect it. AP then flashes yellow for five seconds with a tone. An automatic disconnect flashes red until you press AP DISC or the trim switch. If you suspect a malfunction, grip the wheel and hold AP DISC down, which also cuts power to the servos.
The flight director
The flight director (FD) works out the attitude to fly and draws it as magenta command bars. You can fly them by hand or let the autopilot follow them. Press FD alone and you get ROL and PIT with no AP. Most mode keys also turn it on, in that mode. Pressing the key of an active mode returns that axis to ROL or PIT.
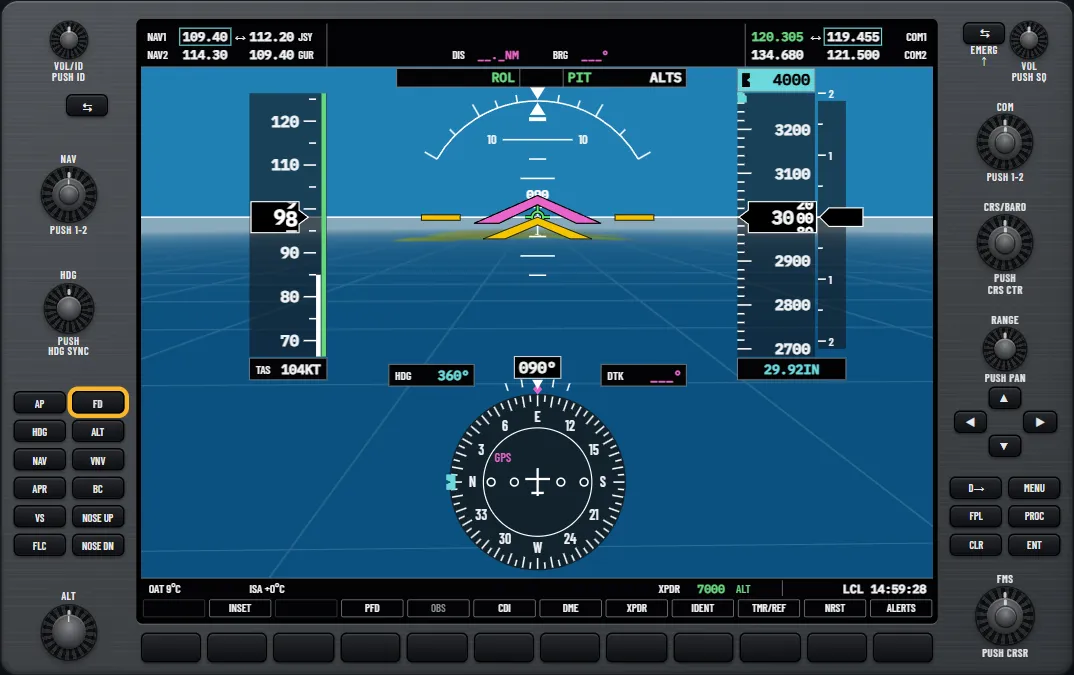
Try it: “The flight director”
HDG and NAV
HDG flies the heading bug, set with the HDG knob. Pushing the knob syncs the bug to your present heading.
NAV follows the source chosen with the CDI softkey, and the status box names it: GPS, VOR or LOC. With the needle more than one dot out the mode arms in white. Within one dot it captures at once. Set the source first, because changing it by hand with NAV active drops the autopilot to ROL, wings level.
Try it: “Heading select”
APR and backcourse
APR flies an approach from the selected source:
- LOC arms the glideslope (GS) too. See flying an ILS on the G1000.
- GPS arms the glidepath (GP) on an approach with vertical guidance, when satellite augmentation is available. See flying an RNAV (LPV) approach.
- VAPP is VOR approach mode. It tracks more tightly than VOR NAV, and you fly the descent in VS or FLC.
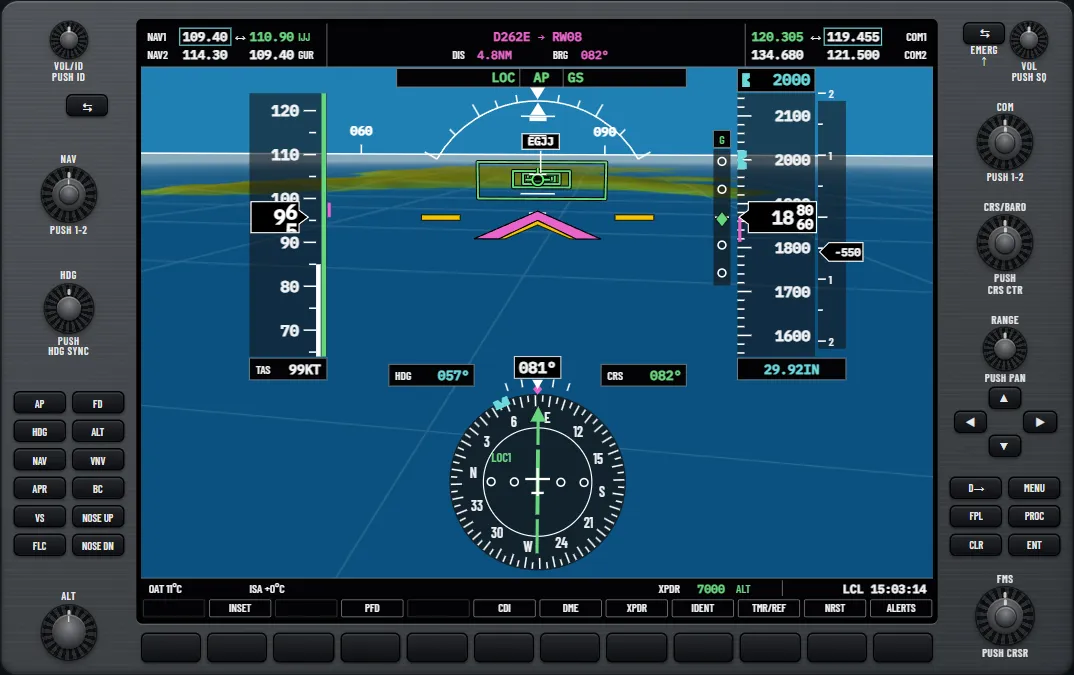
BC tracks a localiser’s back beam. Set the front course with the CRS knob, even though you fly the other way, then press BC.
Try it: “VOR approach mode”, on the Jersey VOR/DME 08
Try it: “Backcourse mode”, an exercise on a localiser’s back beam
ALT and VS
ALT holds the altitude you had when you pressed it, to the nearest 10 ft. The ALT knob then changes only the selected altitude.
VS takes your present vertical speed, to the nearest 100 fpm, as its reference. If you are level that is zero, so dial in a rate with NOSE UP or NOSE DN at 100 fpm a press, between 2000 fpm down and 1500 fpm up.
VS, FLC and PIT all arm the capture of the selected altitude, shown as white ALTS. Near that altitude ALTS turns green, and at 50 ft ALT takes over.
FLC
FLC stands for Flight Level Change. It takes your present airspeed as the reference, and NOSE UP or NOSE DN change it by a knot a press. Pitch holds the speed and power sets the climb or descent. Set the selected altitude first, because FLC will not take you away from it. Then press FLC and change the power. Once level, set cruise power, because ALT holds the altitude and leaves the speed to you.
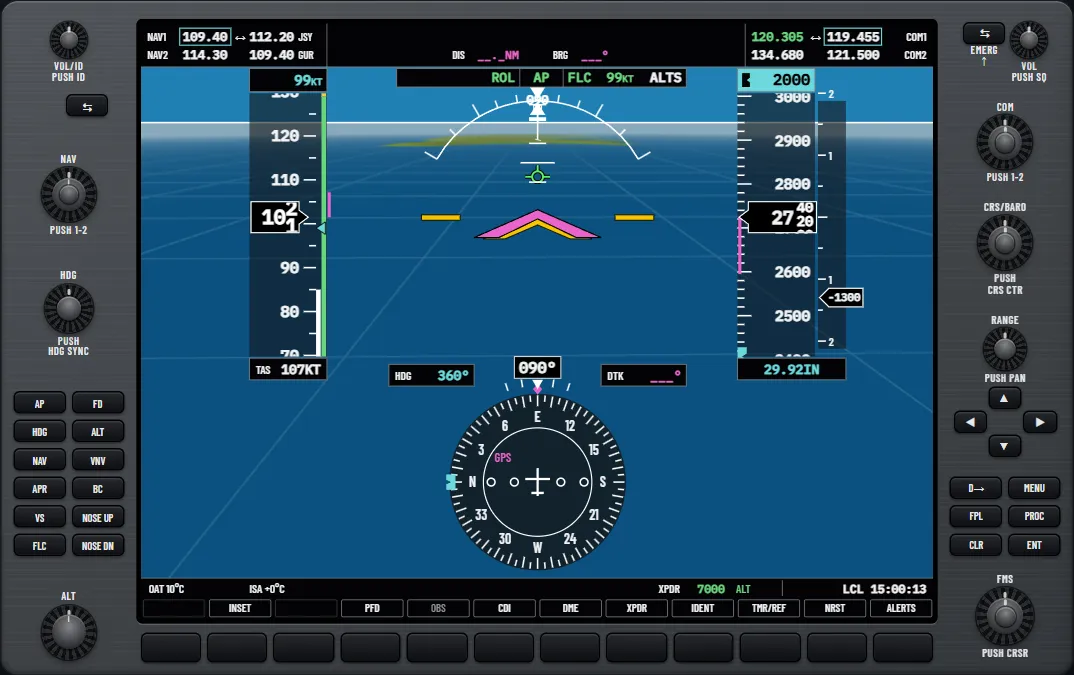
FLC against VS
The difference shows when performance runs out. Ask VS for a rate the aircraft cannot sustain and the nose keeps rising as the speed falls, which is how autopilots have been flown into stalls. In FLC the speed stays put and the rate gives way. The MAXSPD warning only covers the fast end, so watch the slow end yourself.
- FLC suits long climbs at a chosen speed, the climb after a go-around, and large descents where you want to set the speed.
- VS suits small level changes near cruise speed, a rate air traffic control has asked for, and descents where a steady rate makes the timing simple.
Try it: “Example: a descent in FLC”
VNV path descents
VNV (vertical navigation) flies a computed descent path to an altitude at a waypoint, and shows as VPTH. It works in descents only. It needs GPS as the CDI source, an active flight plan with a designated altitude, and VNV enabled with the ENBL VNV softkey on the multi-function display’s flight plan page.
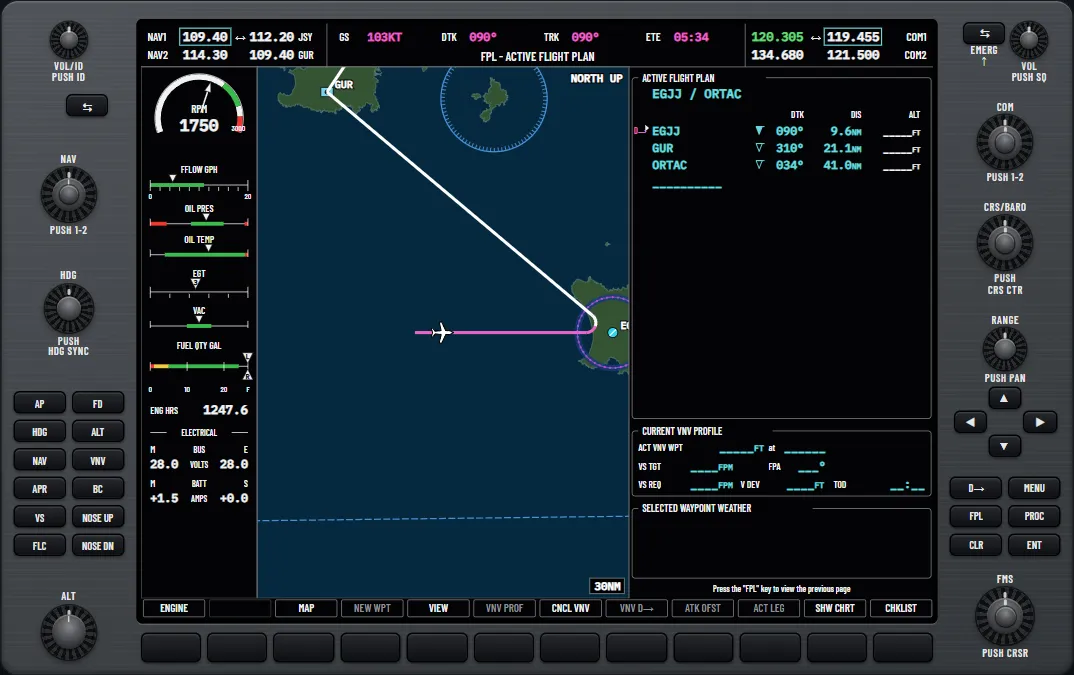
- Press VNV. VPTH arms in white.
- Set the selected altitude below the target. It takes priority, so if it is above the target the autopilot captures it instead.
- A minute before the top of descent, “TOD within 1 minute” appears. If the white VPTH flashes, press VNV or turn the ALT knob. Without that the aircraft does not descend.
- At the top of descent VPTH turns green, with ALTV in white for the target. Near the target ALTV turns green, and at 50 ft ALT takes over.
The power stays with you. To go down early, press FLC or VS, and VPTH drops back to armed so it can pick up the path later.
Reading the annunciations
The status box reads left to right: lateral armed, lateral active, autopilot, vertical active with its reference, vertical armed. So LOC HDG, AP, ALT 9000FT, GS means you are on a heading and holding 9000 ft, with the localiser and glideslope armed. Our guide to the G1000 PFD shows where it sits.
- A flashing green mode has just changed automatically.
- A flashing yellow mode has lost its data, such as a VOR signal, and that axis has dropped to ROL or PIT.
- Yellow AIL or ELE is a mistrim: a servo is holding a steady force, so be ready for it when the autopilot lets go.
- Red PTRM is a pitch trim failure: take control and disengage the autopilot.
- MAXSPD flashes yellow at the top of the airspeed tape in an overspeed. Reduce power or raise the pitch reference. It is not active in ALT, GS or GP.
Read the box after every key press, because it confirms what the autopilot accepted. You can practise all of this in the free glass cockpit trainer for the G1000. In the aircraft, follow your flight manual and the approved pilot’s guide.
Questions pilots ask
- What does FLC stand for?
- Flight Level Change. It holds an airspeed with pitch, and your power setting decides whether you climb or descend.
- What is the difference between FLC and VS?
- VS holds a rate of climb or descent and the speed is whatever results. FLC holds an airspeed and the rate is whatever results.
- What does VPTH mean?
- Vertical path tracking, the mode the VNV key selects. In white it is armed, and in green the autopilot is flying the descent path.
- What is the difference between ALTS and ALT?
- ALTS is the capture of the selected altitude, and ALT is holding an altitude. The change from ALTS to ALT comes 50 ft from the selected altitude.
- Does the G1000 autopilot control the throttle?
- No. Its servos move pitch, roll and pitch trim, so the power is always yours to set.
- Why does the FD key do nothing?
- The FD key is disabled while the autopilot is engaged. Disconnect the autopilot first, and the key will then turn the flight director off.
See it for yourself
Free and interactive, in your browser. No sign-up, nothing to install.
Sources and further reading
- FAA: Advanced Avionics Handbook (FAA-H-8083-6)
- FAA: Instrument Flying Handbook (FAA-H-8083-15B)
- AOPA: Flying pitch mode, on stalls from unobtainable vertical speed commands
- SKYbrary: Cockpit Automation, Advantages and Safety Challenges
A teaching aid, not an operating manual: the aircraft's flight manual, the published procedures and your instructor come first.
Unofficial training aid. Not affiliated with or endorsed by Garmin. Not for flight: always follow the approved pilot's guide and your instructor. Garmin and G1000 are trademarks of Garmin Ltd. or its subsidiaries.